Hi Everyone,
I KNOW. This is literally one year over due. I have so many questions about the dimensions and the exact steps – how we did it. So here I am, one year later, I am finally typing this out. I had to borrow some photos because I can’t for the life for me search through all my photos… but I’ll link where I found them so you can see what others did as well!
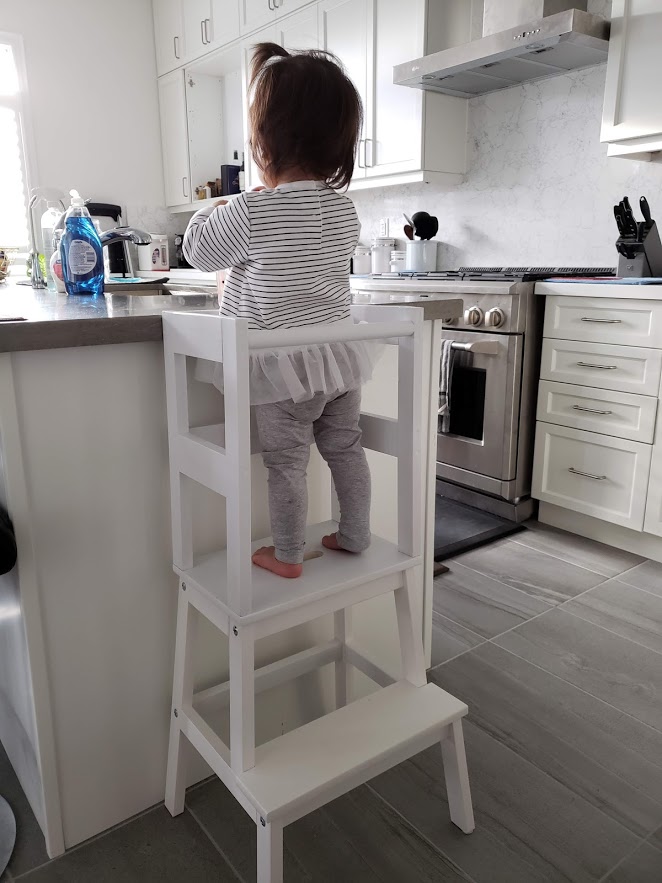
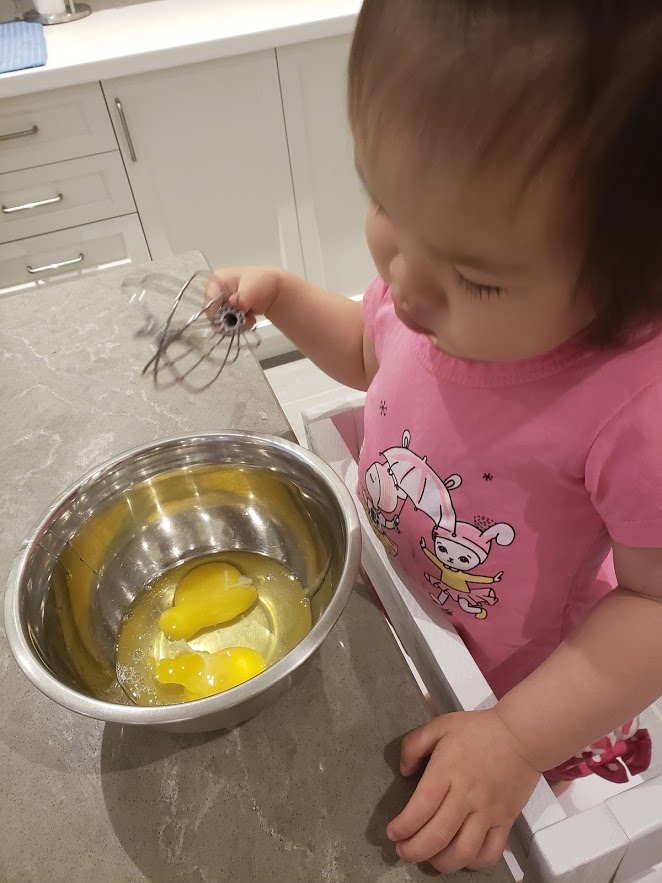
It’s been roughly over a year now, and we are STILL using it. It’s so useful, and you guys need this in your kitchen. She’s not at my feet and she loves cutting her own fruits up on the kitchen counter!
As you know, I love raising an independent child, because it seriously makes my life easier. There are downsides because sometimes, it will legit takes her 10 mins to put on jacket, socks, shoes and any other toys she wants to bring out. But it’s wroth it. I haven’t cut anything/peel anything for her since. It free up my time to do my own thing. AND she feels accomplished when she finish peeling/cutting apple or orange. It’s a win win situation really.
This is in no way my idea, it’s all over pinterest and a lot of bloggers have wrote about this. I’ve taken some of their ideas and made it my own to fit my measurement at home.
Learning towers build your toddler’s confidence and independence by encouraging them to cook, clean, and participate in other daily tasks right alongside with you. These types of sensory experiences are fundamentally transcendent.
Here is the tutorial by Sina at Happy Grey Lucky, but there were some steps we didn’t follow and made it my own:
Tools:
- drill
- 1/16″ drill bit for #6 screws (or 5/64″ for #8 screws)
- screwdriver
- tape measure or ruler
- level
- electric sander or sandpaper
- pencil
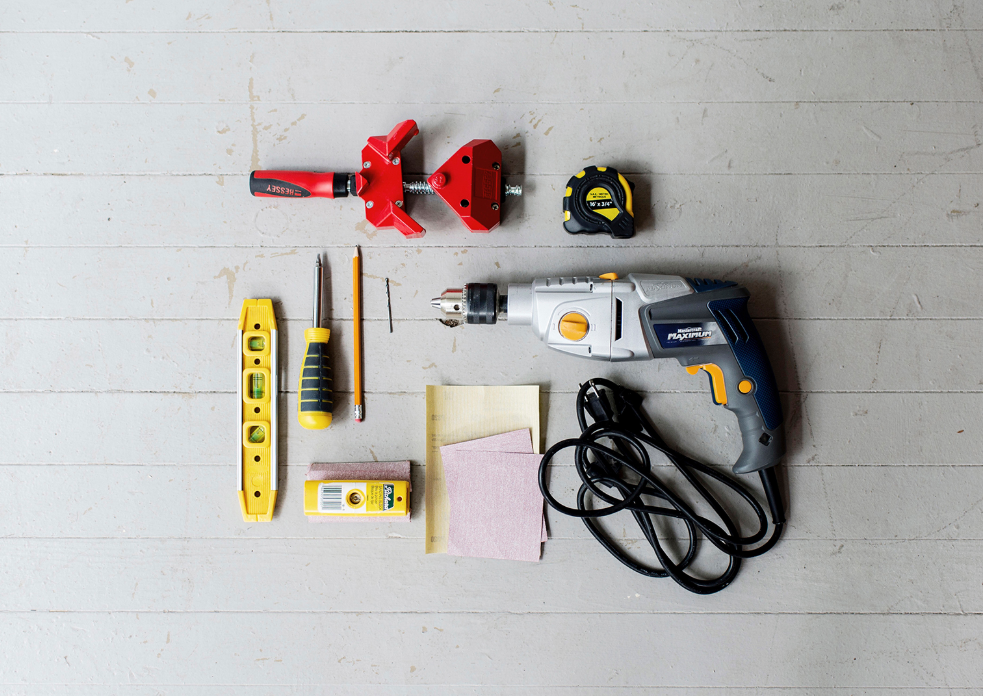
Photo Cred: HappyGreyLucky
Supplies:
- Ikea BEKVÄM stool
- 6’ long 1×2 (¾” x 1½”) piece of wood cut into four 15½” lengths (Home Depot)
- 6’ long 1×3 (¾” x 2½”) piece of wood cut into four 6” lengths and two 12½” lengths
- (Home Depot)
- ½” dowel rod (shortest length you can find) cut to 12½” (We didn’t end up using this, because my child didn’t like the dowel)
- 16 (sixteen count) 2¼” #6-8 wood screws
- 14 (fourteen count) 1½” #6-8 wood screws
- Small tube of wood filler
- 2oz non-toxic paint (She used paint as seen in the picture, but we decided to use paint instead, less messy and less chemicals)
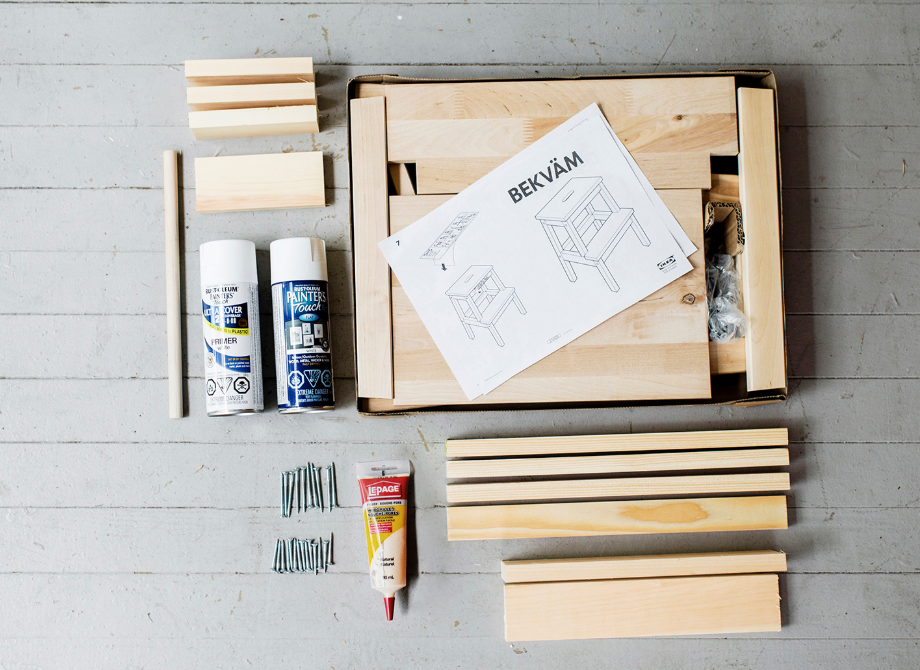
Photo Cred: HappyGreyLucky
Here’s the wood cut list: (L x W x D):
- (4) 15½” x 1½” x ¾” (39.3cm x 3.8cm x 1.9cm)
- (2) 12¾” x 2½” x ¾” (32.4cm x 6.4cm x 1.9cm)
- (4) 6½” x 2½” x ¾” (16.5cm x 6.4cm x 1.9cm)
- (1) 12¾” x ½” (32.4cm x 1.3cm) round dowel
For reference, my learning tower is 36″ high, I wanted to match my counter height exactly, measure the distance between your floor and top of your counter and subtract the height of the Ikea stool (about 19¾” or 50cm with a floor protector pad attached to the bottom). This will give you the length of your four 1x2s (the first item in the cut list).
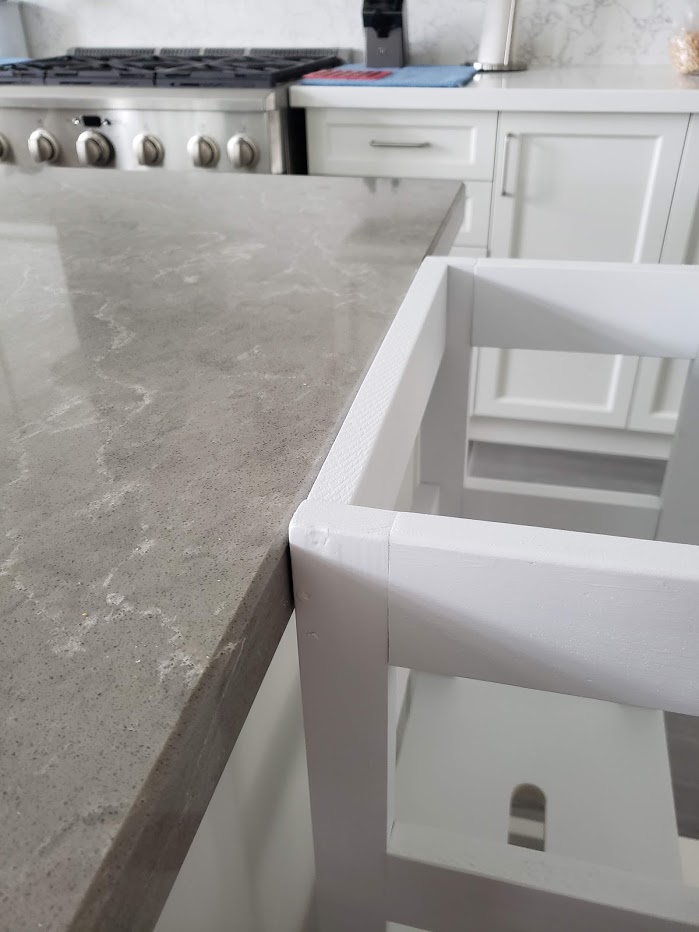

Note: make sure to measure your stool before starting. The top of my stool is approximately 9½″ x 14¼″ (24.1cm x 36.2cm). If your stool is different than that, here’s a simple calculation to determine your wood pieces:
Instructions:
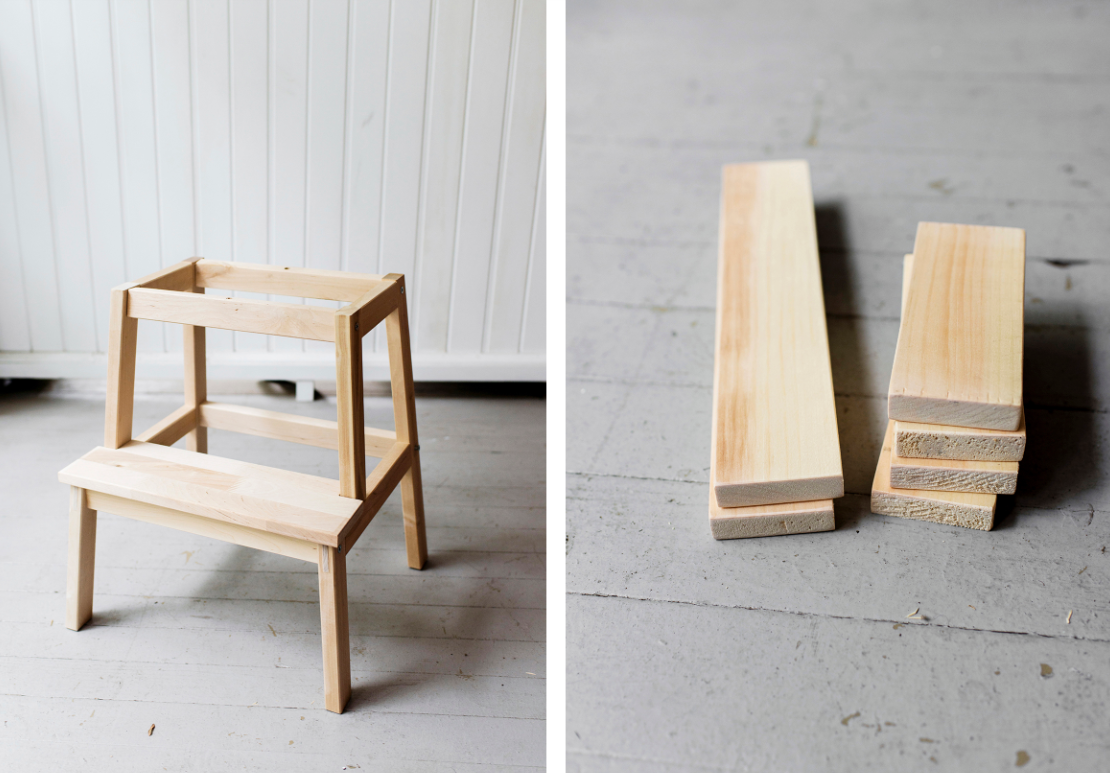
Photo Cred: HappyGreyLucky
- Assemble the Ikea step stool up to step 5 in the instruction manual (leave the top piece unattached). If you’re starting out with an pre-assembled stool, unscrew the top piece and set it aside.
- Take your pre-cut wood and sand all the ends and edges (to keep toddler fingers safe).
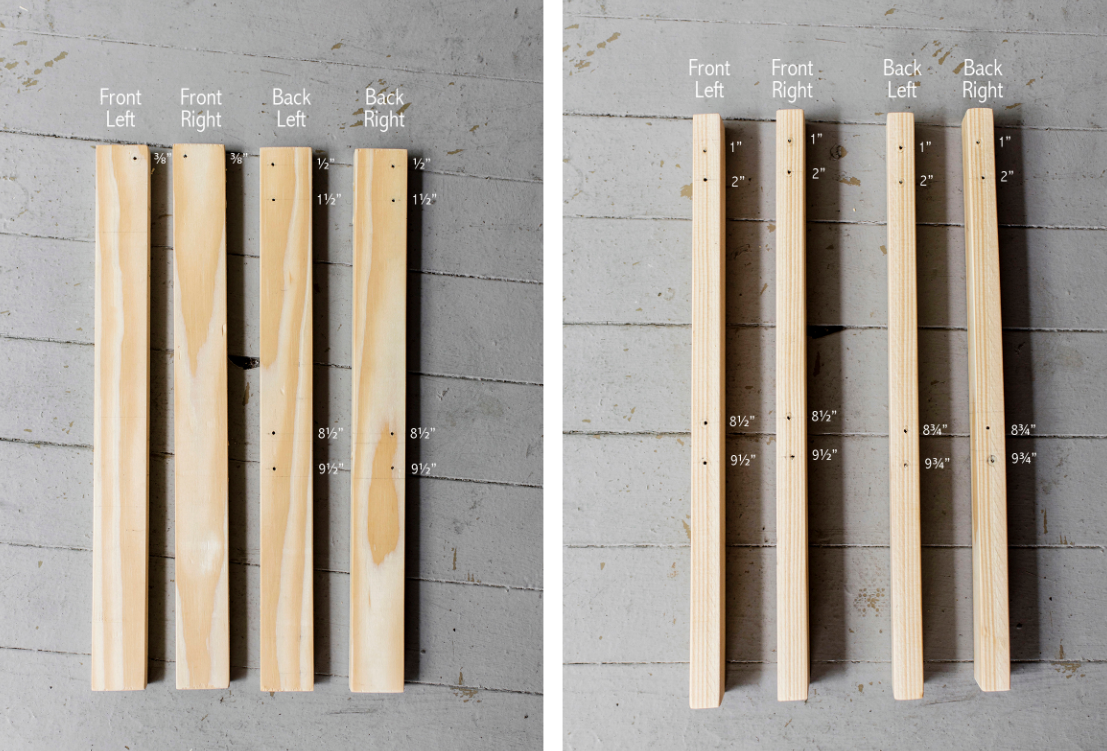
Photo Cred: HappyGreyLucky
3. Mark your pilot holes on the four 1x2s (the longer, thinner pieces).
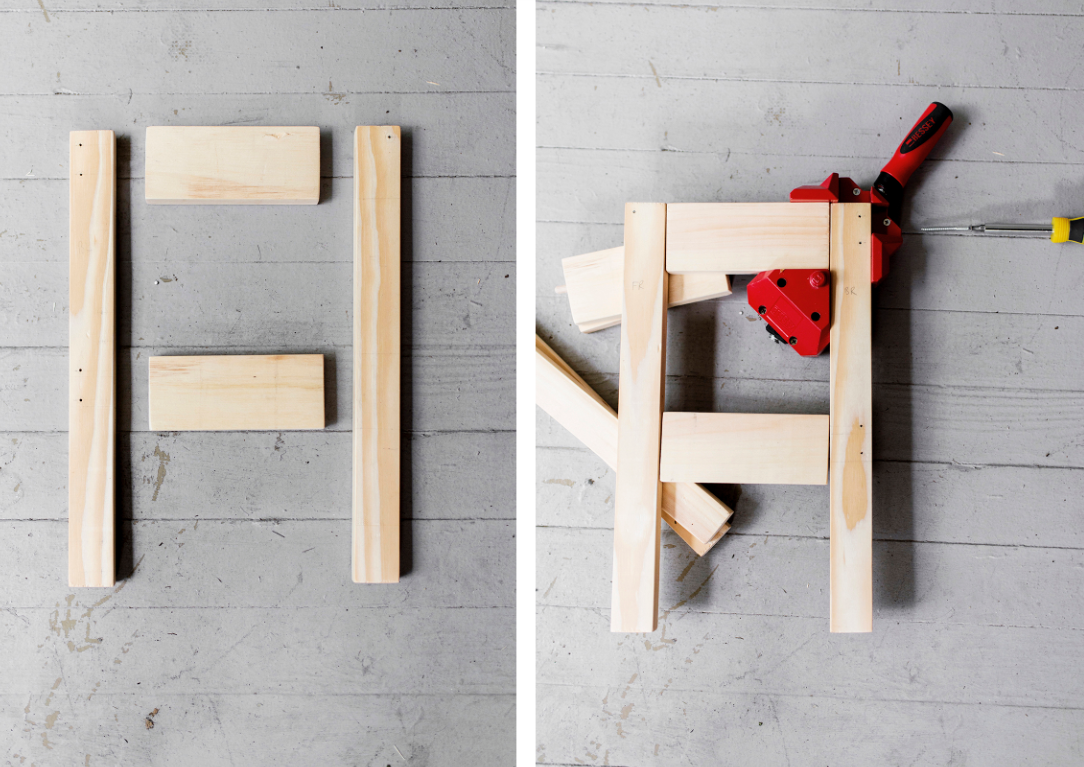
Photo Cred: HappyGreyLucky
4. Put together one side of the frame. Take one of the pieces labelled “front” and one labeled “back,” as well as two of the short 6″ support pieces. Attach everything using eight 2¼″ screws (four for each side). Use an angle clamp, protractor, or a level to make sure the horizontal support pieces are attached to the vertical beams at 90° angles.
A note about splitting wood: pine is notorious for wood splitting, and screwing close to the edge of a piece of wood makes splitting wood more likely. I didn’t have any issues, but if you want to avoid splitting the wood, use a countersink drill bit when pre-drilling your holes.
A note about putting your screws in: if you want to make your stool as sleek as possible (aka using wood filler on top of the screws to effectively hide them in step 11), make sure to have them completely recessed. Pine isn’t the ideal wood for this (even with pilot holes), so work manually and go slowly. You want the screw to go far enough to wood filler on top, but not too far where you’ll split the wood.
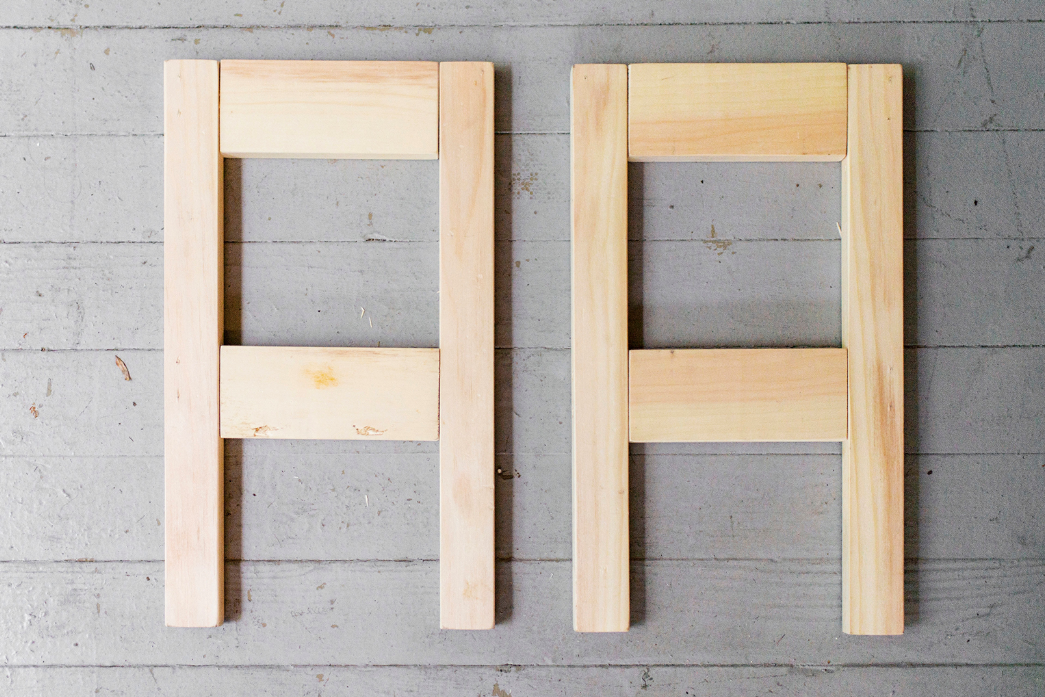 Photo Cred: HappyGreyLucky
5. Repeat step 4 for the other side of the frame.
6. Now attach the left and right frame together with the two longer (12 ¾″) support beams using eight 1.5″ screws (4 per side).
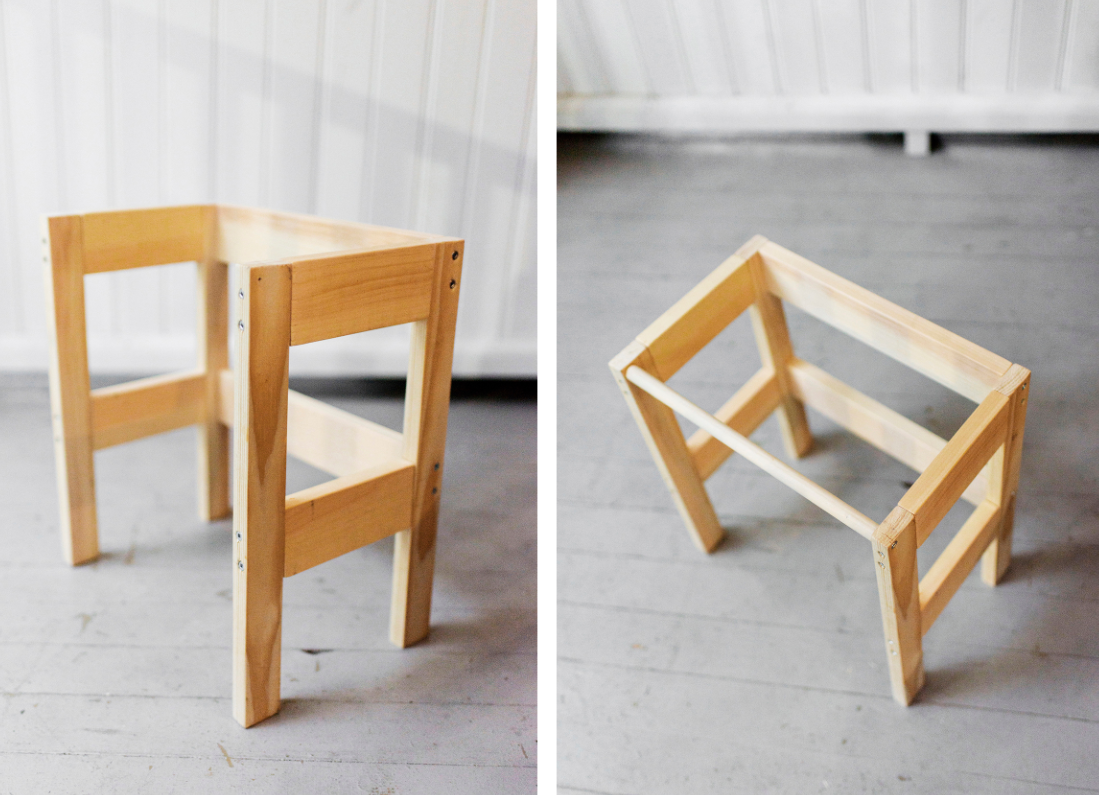 Photo Cred: HappyGreyLucky
7. Attach the round dowel to the front of your frame using two 1.5″ screws.
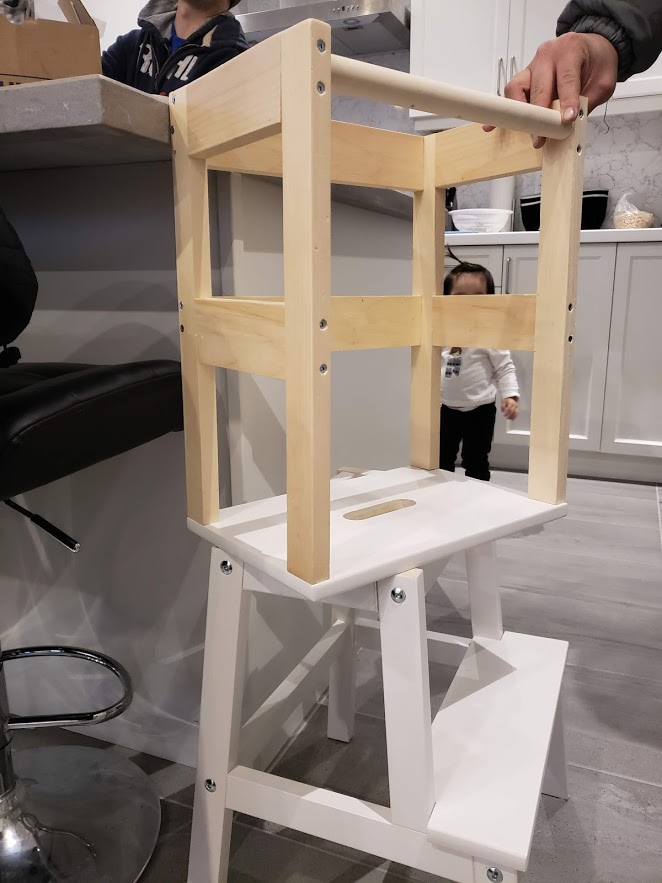
8. Take the top piece of the Ikea step stool and place your frame on top of it. Trace around the legs to mark where your frame will attach to the stool. Take the frame off again and mark the middle of your four rectangles. Drill a pilot hole into each of these four centers.
9. Put your frame upside down and attach the Ikea top piece to your frame with four 1.5″ screws.
10. Finish the last steps of the Ikea instruction manual (steps 5 and 6) to attach your frame to the rest of the stool.
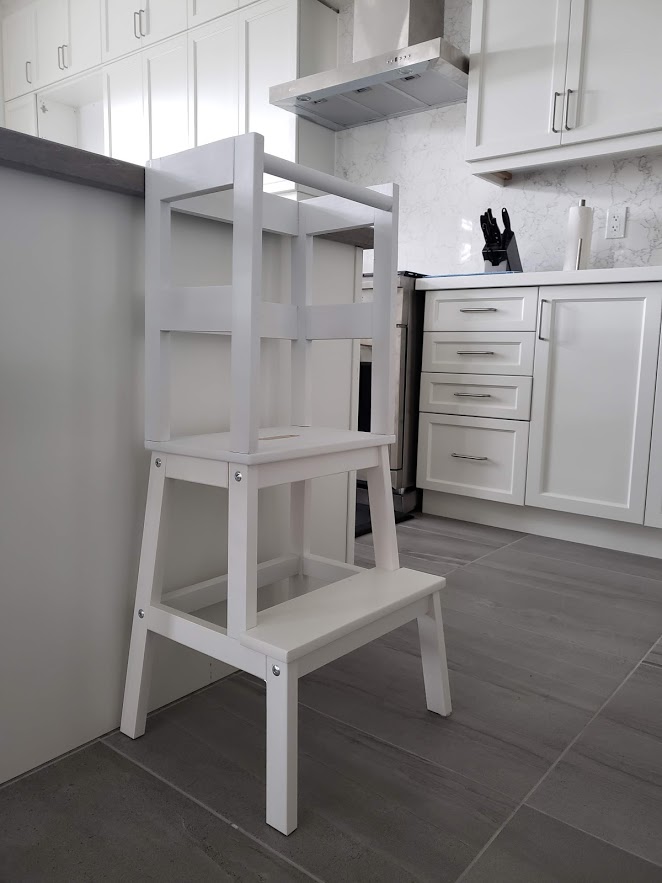
11. Apply wood filler over the screw holes and any other imperfections in the wood will make the learning tower look as sleek as possible (don’t put wood filler on top of the Ikea screws since those are not recessed).
12. When the wood filler is dry, sand it down and then paint the learning tower.
Thanks so much for reading,


1 Comments
Comments are closed.